It's the off season: the perfect time for bike upgrades!

This year Nat has signed up for her first 70.3 triathlon so her TT bike will become the weapon of choice for training and racing with a long course focus. She is currently getting around on this Cannondale Slice Women's specific. It is the XS size with the 650c wheels which suits as Nat stands 156cm (5'2")

It was bought second hand and has served her well for a couple of seasons but it has fairly entry level specs:

  • 105 mechanical shift
  • Semi internal cabling
  • Basic aluminium cockpit
  • Conventional stem
  • Standard Tekro brakes
  • Ok 30mm deep aero wheels


So starts the project we will Blog about over the next month or so.


Saturday 27 June 2015

SHIMANO Di2 PARTS LIST


Time to get serious and purchase the Shimano Di2 electronic shift gear.  

There are a few options within the Shimano Di2 range and most of the parts are readily interchangeable.  I familiarised myself with the Shimano e-tubeproject website which provides a comprehensive guide to compatibility and the history of the firmware upgrades since Di2 was introduced.

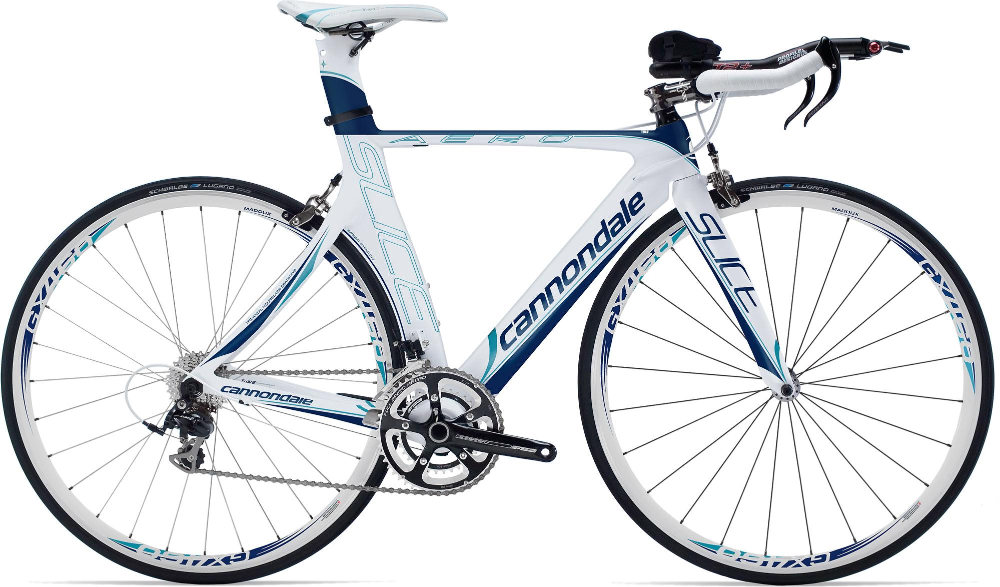
We opted to stick with 10 Speed Ultegra 6770 Deraileurs due to wheel compatability!  The 650c wheels we had were going to be difficult to convert to the wider 11 speed cassette and so we've decided to upgrade my Shiv to 11 speed (easier to do) and use the 6770 derailleurs over to the Slice.

From there I went to the  Shimano Manuals (available online) to figure out the balance of the parts. In general I stuff with the Ultegra 6870 parts where available.

DM-0001A-002 - 6770 Ultegra Dealers Manual  - Majority of the parts but only the external battery.

DM-UL0001-00 – 6870 Ultegra Dealers Manual - Schematics and part numbers for the internal battery and time trial shifters.

The cable lengths for the 650C frame were determined by measuring the frame tubes and allowing around 50 - 100mm extra that will be tucked into the frame tubes once it is all plugged together.

The battery cable allows the seat tube to be removed 100mm clear of the frame for access to unplug the cable.


To save a few dollars I opted to go for the DIY remote shifters using an SW-R600 climbing shifter and a set of Cateye CD300DW buttons instead of the bulky Shimano ST-6871 brake levers.  I have already done this successfully on my Shiv TT and will provide more details on this as I go this time around.


SHIMANO Di2 PARTS LIST
No.
Description
Part Number
1
Front Derailleur
FD-6770
2
Rear Derailleur
RD-6770
3
Front Junction A (5 Port)
EW90-B JB
4
Rear Junction B
SM-JC41
5
Internal Battery
SM-BTR2
6
Down Tube E-tube Cable
EW-SD50 (750mm)
7
Seat Tube E-tube Cable
EW-SD50 (650mm)
8
Rear Derailleur E-tube Cable
EW-SD50 (600mm)
9
Front Derailleur E-tube Cable
EW-SD50 (400mm)
10
TT Bar Switches
SW-R671
11
Battery Charger and USB interface
SM-BCR2
12
Polyurethane Flexible Adhesive
Sikaflex 227 (or similar)
13
Grommets 6mm
SM-GM01
14
Cable cover stickers
SM-EWC2
15
Plug Tool
TL-EW02
16
TT Horn / Brake Shifters (Normal)
ST-6871 (Option 1)
17
TT Horn / Brake Shifter (DIY)
SW-R600 (Option 2)
18
TT Horn / Brake Shift Buttons (DIY)
Cateye CD300DW (Option 2)
19
JST Connectors (DIY)
JST 2 Pin
20
Flexible Cables (DIY)
15AWG Electrical Cable
21
Adhesive
5 Minute Epoxy
22
Cable protection
Heat Shrink
Notes:

1. Items 1->12 are required as a minimum (Or equivalent alternatives)
2. Items 13->15 help prduce a neat install
3. Item 16 is the optional ST-6871 brake lever shifters
4. Items 17->22 are optional DIY brake shifter parts (RD Shift only)

I included a few consumables and adhesives which I know I will need from my experience in the previous Di2 Shiv TT build.  I will explain the need for those as the build progresses.

Armed with this list of part numbers I scoured all the available suppliers and eventually ordered everything I needed.  No single supplier could provide all the parts, stocks were limited and prices varied significantly so some time invested here yielded good savings which will go towards that power meter budget ;-)

We'll have a week or two wait for the parts but there is still more to do!  Next up we'll move on to the cockpit upgrade.

Thursday 25 June 2015

ELECTRONIC SHIFT UPGRADE PLAN

Sourcing the parts for a Di2 conversion is fairly daunting at first but I have done it successfully before on my Shiv TT (also not a Di2 specific frameset).  Majority of the info we needed was in the Shimano manuals and my preferred approach is summarised by these two diagrams:


So we need to do some investigation to determine:
  • Suitable junction box locations (Internal or external)
  • Internal or external battery
  • Internal / External cabling (or a hybrid)
  • Wire lengths

So surely someone has done this before but I can't find a blog or forum post anywhere showing a fully internal upgrade for this bike!   Most of the upgrades were done when Di2 was new and the internal battery was not an option.

I’m really keen for the fully internal battery as the plan was to get cables out of the wind for the aero benefits, less clutter and be comaparable with a 2015 model bike.

The external batteries are clunky and they don't communicate with the newer USB interface / charger I use now and I don’t want to buy the older PC interface and battery charger if I can avoid it.

So I persisted and eventually the main limitation became clear; the seat tube was not open into the bottom bracket cavity!  I quick check of our frame confirmed this area was blocked and I can see how this would deter most people.

Some poking from above and below got me to the same spot at the base of the seat tube suggesting the barrier was very thin.  I fashioned a makeshift 3mm drill extension and with a few seconds on the drill it was through and I could see the shiny alloy bottom bracket tube below!

The barrier layer is indeed very thin so I’m relieved of any concerns about this hole reducing the structural integrity in the frame.  The hole was in the centre of the tube away from the sides where there may be splice connections between the carbon tubes.

With some patience I managed to fish a wire out the bottom to satisfy myself that a full internal setup was possible.

With some 10mm OD x 7mm ID aluminium tube, a 7mm drill and 5 minute epoxy I fashioned a long drill to enlarge the hole sufficiently to pass the 5mm Di2 plugs.

I’m now ready to finalise my Di2 shopping list.

Wednesday 24 June 2015

RACE WHEELS INVESTIGATION

Before we can fully commit to the 650c frame size we need to be sure we can find some decent race wheels.

We searched a couple of years ago and the best we found was an old set of Corima 40mm deep wheels which I rebuilt last winter.  These were fine for sprint and olympic distance races but were not of the calibre of the Zipp 404 650c wheels which are still available.

So the Zipps went to the top of the wish list and we worked down from there with these options:

1.    New Zipp 650c 404’s in Firecrest clincher ~ $2500
2.    Gravity Zero 60mm Deep Tubular ~ $1500
3.    Generic 50mm Deep 23mm Wide (RC50W-650C) prebuilt with Novatec hubs ~ $500 
4.    Generic rims, laced up myself with quality spokes and hubs ~ $800
5.    See what pops up second hand, ideally a set of Zipp 404’s


The Gravity Zeros are a good option, readily available locally so they are there if nothing else come along.

Keep in mind that a decent saving here could contribute to a power meter, so let's see if we can find something under $1000 in the mean time, off to Aliexpress!

Well the generic wheels out of China seem to have improved a lot in the last few years and they now have a 50mm Deep 23mm wide carbon clincher in 650c which look good on paper:
  • Titanium wire reinforced clincher bead
  • Basalt braking surface
  • Reinforcement layer behind the brake track
  • Inside out pressure moulded
  • See cross section of rim below
  • Look aero but you never know unless someone puts them in a wind tunnel


These seem impressive and surely fit for purpose for a 45kg rider and definitely an improvement on the old Corima wheels which are the older foam core construction.  I know plenty of guys getting around on these wheels now so I have reasonable confidence in the rims, not so much the spokes and build quality though.


So I'm leaning towards buying a set of generic generic rims and building them up myself with some quality hubs and spokes. The build would add to the fun of the project and give me full control over the build quality.

The only thing that stopping us ordering the rims is they were only 50mm deep a slight compromise on the Zip 404 an Gravity Zero's at 58-60mm.

So that's enough to reassure us that the 650c build up wouldn't be compromised by lack of quality wheelset options. We have time to think that over and move on to the rest of the build plan while continue to look for some second hand Zipp 404's.

I did say this would be iterative!

Tuesday 23 June 2015

IDEAS AND RESEARCH PHASE

The process of deciding the best upgrades will be iterative so lets start with the vague plan:
  • Re-use the 2011 Slice Women’s 650C frameset
  • Aim for a result on par with  2015 model Ultegra Di2 at a fraction of the cost
  • Use savings for options such as carbon race wheels and power meter
  • End up with something unique and very specific to Nats needs
From here we'll see what parts are out there, evaluate a few options for cost versus technical benefit and see what we end up with.

The areas we saw as the easiest gains were:
  • Carbon Race Wheels
  • Carbon Aero cockpit with internal cable routing
  • Di2 Shift Gear for practicality and less cable clutter messing up the aerodynamics

    These parts will need to be selected for improved aerodynamics while improving the bike geometry & maintaining adjustability for a comfortable but aerodynamic body riding position.

    Ultimately a power meter is a seen as an ideal addition to the training toolkit so at this stage we have this idea in our minds as something we will consider when we have a better idea what the basic bike mods will cost.  A power meter is a fairly easy addition at any time.

    Sunday 21 June 2015

    CONCEPT VALIDATION

    After much research on new bikes, we decided to see what we could do with the humble old slice.

    Pros:
    • We've got one
    • Size and fit is good
    • Its 650c which are hard to find now
    • Stack can go lower with a 17 degree (flat) stem and removing stem spacers
    • Internal cable routing for rear brake
    • A quick look suggests Di2 wiring can go internal with a decent cavity in bottom bracket
    • Okay 30mm deep aero training wheelset

    Cons
    • Cheap Tektro brakes, bad aero and ugly
    • Ugly alloy basebar and cables everywhere
    • Mechanical shift and no shifters at the brake lever

    Looking at the "cons", there was not a lot we couldn't fix!

    First thing's first though, before we strip it down and start changing parts, let's play around with the bike fit to make sure we can get a more aero position.

    A quick look shows that there was a 6 degree stem and 30mm of spacers and the arm pads were resting on top of the aero bars.

    We flipped the aerobar bracket and got the arm pads hard on top of the base bar which got the pad stack down to at 520mm.

    6 Degree stem spaced up
    Stem slammed

    We still have the 17 degree flat stem option available for a further 15mm drop.

    The base bar horns were now quite low as they were a 35mm drop.  A quick search confirmed plenty of flat base bars available to bring that back up where it was before the stem changes while still keeping the low TT position.

    My theory is the base bar horns should be reasonably comfortable as they are mostly needed for training rides and racing should be almost always on the TT bars.

    It all looks very promising, we can see a lot of potential for the Slice.

    From here Nat can test it out for a few weeks during her wind trainers sessions while we progress with ordering parts for the upgrade.

    Saturday 20 June 2015

    TT BIKE UPGRADE - DECISIONS!


    At first, we figured it was time for a new bike.  Now, finding a women's specific time trial bike for a shorter rider can be quite a challenge as we found out.  The original purchase of the Slice was one of those right place, at the right time, grab a bargain type things and it just happened to end up being a great bike!

    But now we were faced with seemingly endless possibilities so we narrowed it down to a basic few criteria:
    • Low stack height
    • Decent set of carbon race wheels
    • 650c preferred if we could find some cheap Zipp 404's in 650c size
    • Di2 Shift
    • More aero than the Slice
    • Not just a cosmetic upgrade
    We soon realised that the manufacturers had all started going away from the 650c frames leaving only a few options
    • Felt B2, Ultegra Di2
    • Cervelo P3 Ultegra Di2
    • Cannondale Slice Womens Ultegra Di2
    • 2nd Hand Felt DA1 or B2 Frameset with 650c and Bayonet front end
    In general, apart from the Di2, there were no huge technological leaps that justified the $5000 upgrade to any of these bikes.  A second hand Felt DA or B2 seemed the best option for the high modulus carbon frame and the integrated front end but they were hard to come by in the small 650c frame size in Australia.  A few popped up in Europe and USA on Ebay but the shipping costs were prohibitive and we looked for other options.

    We started looking into what bikes could give us a Pad Stack height of 500mm.

    The only 700c bikes that fit the bill were the high end models like the Felt IA with very flat integrated front ends which were well out of our price range.

    We looked at some of the Chinese frames such as the Dengfu FM086 with the integrated flat stem but these started at around $1400 for a frameset for a generic branded bike.  A second hand Felt DA including shipping would have been a preferred option for a build up in my mind.

    So we decided to see what we can do with the Cannondale Slice we've got!